
Xcode Switf Code: Implementing the UI Image to the Card Game
16/10/14 18:51 Filed in: Mobile Xcode Projects
Implementing the UI Image to the Card Game
Today I learned how to add images to the card game project in Xcode 6 and learned about the various image sizes needed for retina and high resolution displays. Its important to have different sizes because each iPhone retina screen size are differ.
Once the images are imported into Xcode 6 image.xacassets folder (which is where the you store the images), the images can be accessed in the storyboard. Below in figure 1 we changed the card UI image from colours to the back of our card image.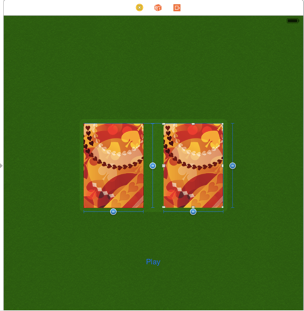
Figure 1: Implemented the back of the card to the UI Image in Xcode’ s Storyboard.
The next step is to get the user to display the cards when he presses the button. So we head to the View Controller.swift and enter the code under the IB action play button. Instead of having the name of the button changing, we will have the card image revealed by using the the self.image = UIImage code as shown below in figure 2.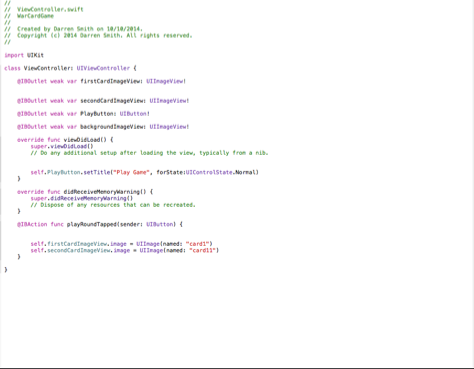
Figure 2: Implementing the code to flip the back of the card.
Once the code is created, it is time to run the program. Figure 3 shows the result.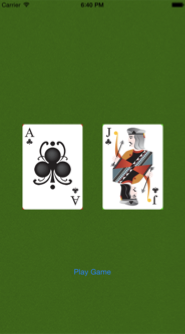
Figure 3: Revealed Cards in the game.