Unity Community Art Competition October 2014 -Completion of the Island
Completion of the Sky Island
I have finally reached the end of the completion and this is my final submission.
Its has been a great competition. This competition primarily is about easing my way back in 3D Computer graphics design and it is a good platform for the future. The future projects will involve a more polished and clean models. Below is in figure 1 is the finished product for the month.
Figure 1: Completed Sky Island Model
Xcode Swift Code: Implementing the Score and the Finish touches to the Card Game
Xcode Swift Code: Implementing the Score and the Finish touches to the Card Game
Today I added finishing touches to the card game. The background was changed and the score text is implemented as shown in figure 1 below.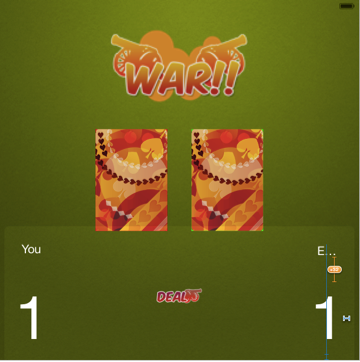
Figure 1: Adding the Player and Enemy Score Text
The next step is to implement the scoring system into the game. This is done by adding the Player and Enemy variables. What these variables do is they store the integer would be in this case the score data. This is illustrated in figure 2 below.
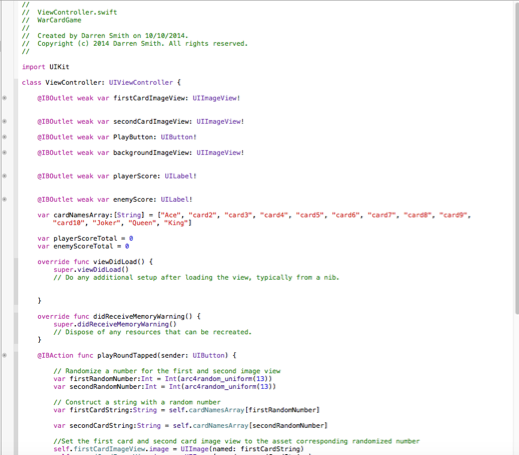
Figure 2: Enemy and Player Variables
Once the variables are added, the scoring conditions are then added into the if statement that is already created. What this condition does is if the player draws a card which is a higher value than the card that enemy has drawn, then he will score a point. However if the cards drawn are both the same then nothing happens and lastly if the enemy draws a card which is higher than the cad that the player has drawn, then he will gain a point. Below in figure 3 is the implementation of the scoring conditions and in figure 4 is the result end of the code.
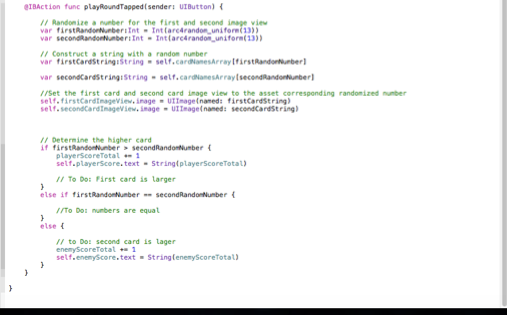
Figure 3: Setting the Scoring Conditions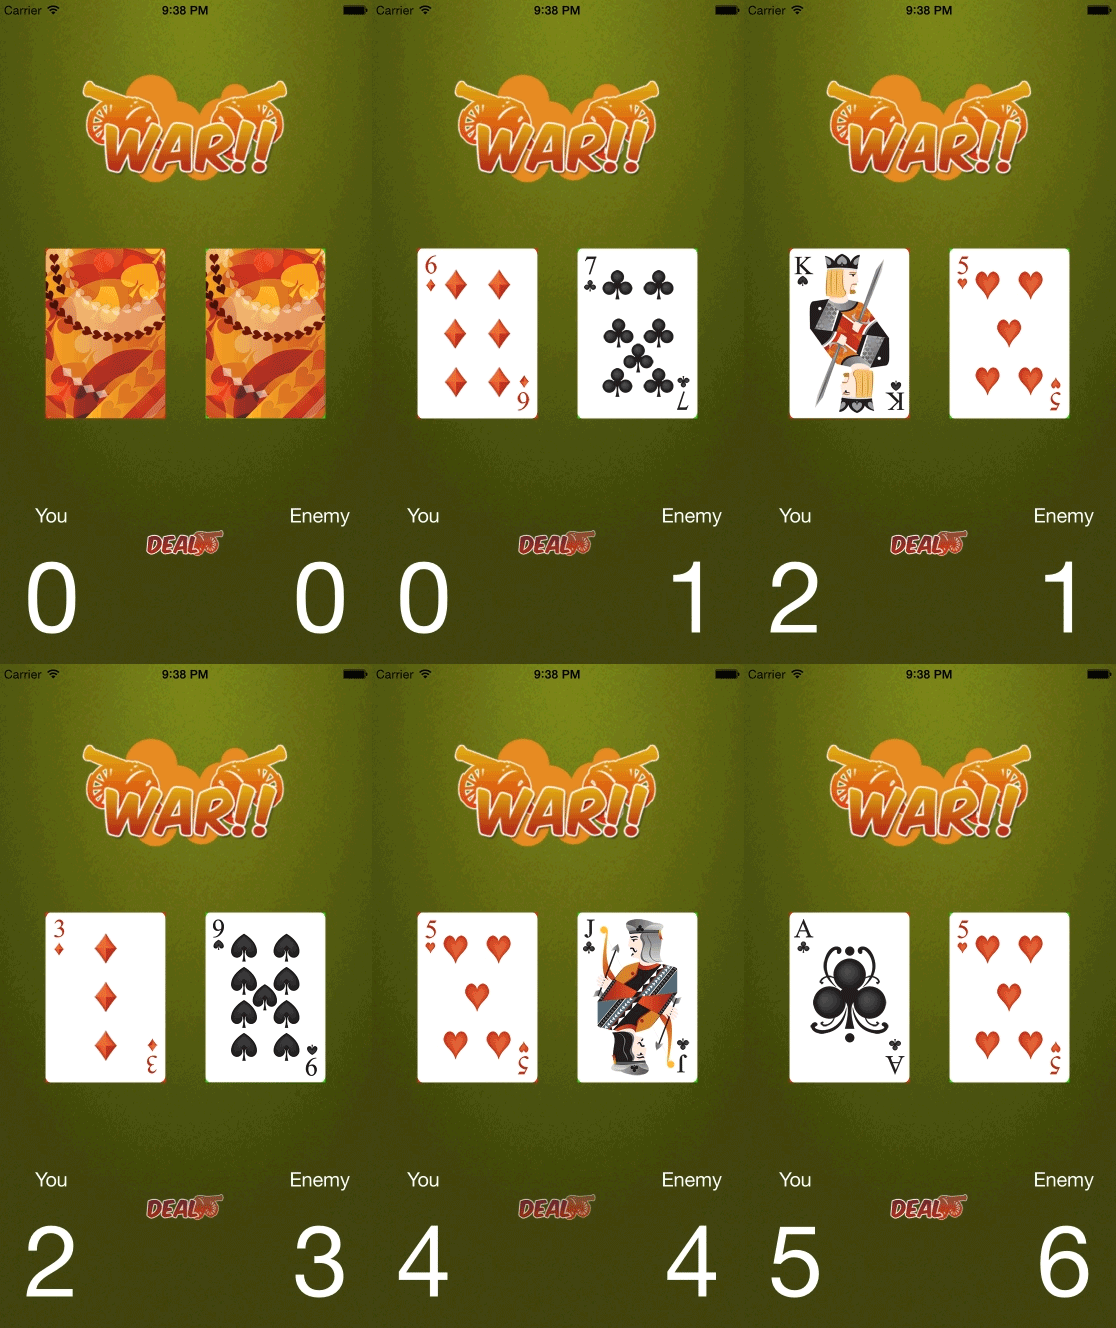
Figure 4: End Result!
Unity Community Art Competition October 2014 - The Island: Adding Texture/Lighting
Texturing and Lightning the Island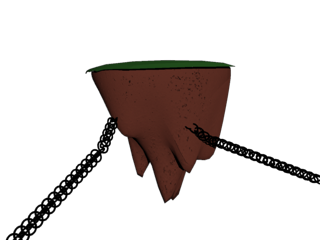
Figure 1: Adding Texture and lighting to the Island.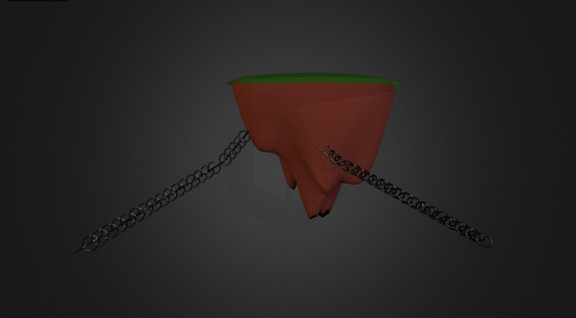
Figure 2: Preview of the Textured Sky Island Model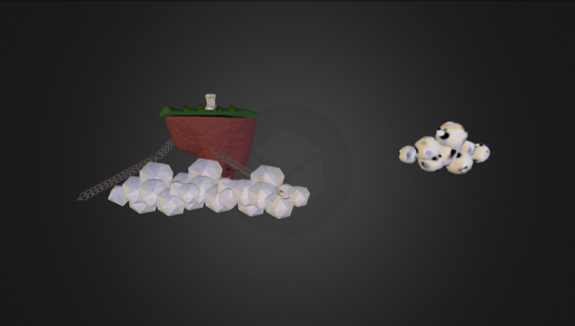
Figure 3: Textured Sky Island model with clouds and dome added
Xcode Swift Code:Introduction to IF Statements
Xcode Swift Code:Introduction to IF Statements
Today is an introduction using IF Statements with swift code in Xcode 6. In order to learn how created use statements I went back to Xcode playground.
An if statement is a condition with multiple outcomes. In order to for the statement to work, the conditions must be made. Depending on how the condition is met will determine the outcomes. Below in figure 1 is an example of how If Statements work.
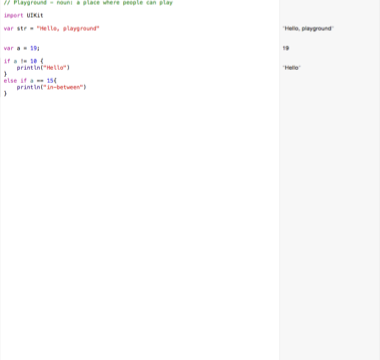
Figure 1:Experimenting the IF Conditions in Xcode Playground
Now that I understand how the function works, I head back to the card game project in Xcode 6. I then create the conditions in order to determine what will happen when the user presses the play button. Below in figure 2 is the implementation of the conditions.
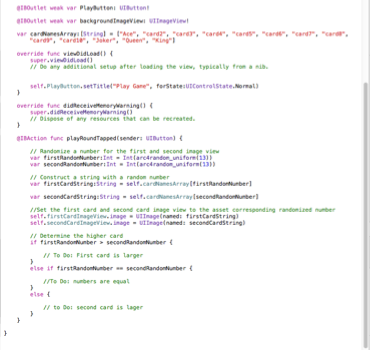
Figure 2: Implementing the IF conditions to the Card Game
The next step is to apply the scoring to the game in order to implement the set conditions.
Xcode Swift Code: Introduction to Arrays in Swift Code
Introduction to Arrays
Today is an introduction into Arrays in Xcode 6. In order to learn how created use arrays, I went back to Xcode playground.
An array is used to create a selection of items and array them in a category. In order do this we use the myArray[].
Below in figure 1 is an example of how arrays work.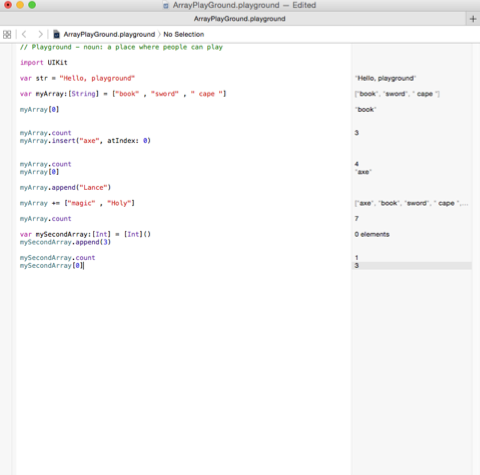
Figure 1:Experimenting with Arrays in Xcode Playground
Now that I understand how the function works, i head back to the card game project in Xcode 6. I then applied the myArray[] function for the UI Image card image underneath the IB Outlet Action button action function. Below in figure 2 is the implementation of the function to the game.
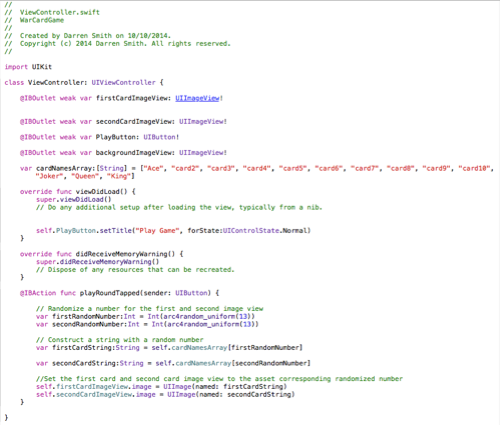
Figure 2: Implementing a Card Array that will randomise the Card Selection
Unity Community Art Competition October 2014 - The Island : Concept Ideas / Model
Unity Community Art Competition October 2014 - The Island
Concept Ideas and Models
Recently I am taking part in Sketchfab competition. The theme of this competition is to design an island.
The deadline for this competition is on the 31st October 2014.
The software that I am using to design the island is 3ds Max, Maya and Blender.
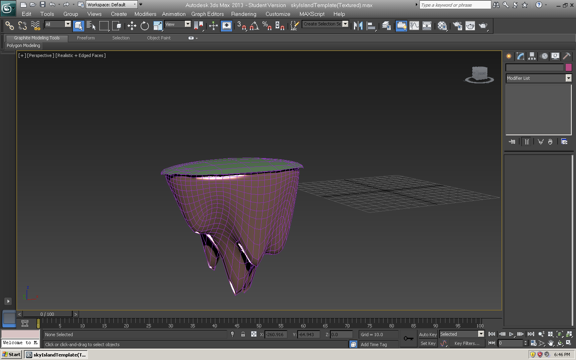
Figure 1: Sky Island Model
Sky Island001
by kumakier
on Sketchfab
Figure 2: Preview of the Sky Model in Sketckfab
Xcode Swift Code: Randomising the Cards for the Card Game
Randomising the Cards for the Card Game
Today I learned how to produce random numbers and change the card images when the button is pressed.
In order to learn how created random numbers, I went back to Xcode playground. In order to generate a number I used arc4random_uniform() function. What this function does is it will look for a number between ranges of 0 - the enter you give it. Below in figure 1 is an illustration of the function.
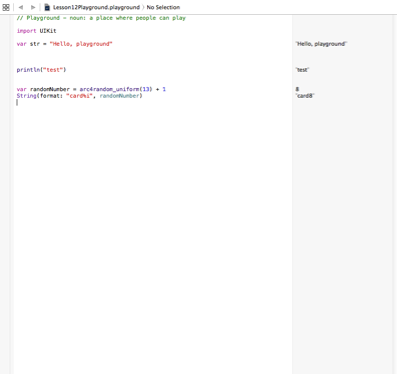
Figure 1: Using Xcode Playground to experiment the random number Class
Now that I understand how the function works, i then headed back to the card game project in Xcode 6. I then applied the arc4random() function for the UI Image card image underneath the IB Action button action function. Below in figure 2 is the implementation of the function to the game.
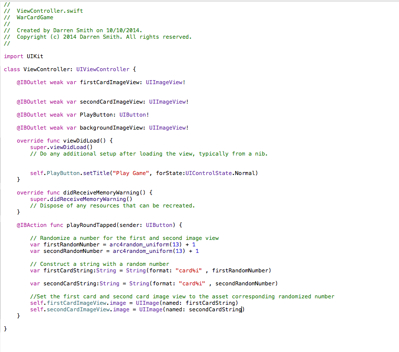
Figure 2: Implementing the random class to the Card game, so random cards will be revealed when the user presses the play button.
Once the code is implemented, the application is tested to see if random cards are revealed each time the user presses the play button. The result is shown below in figure 3.
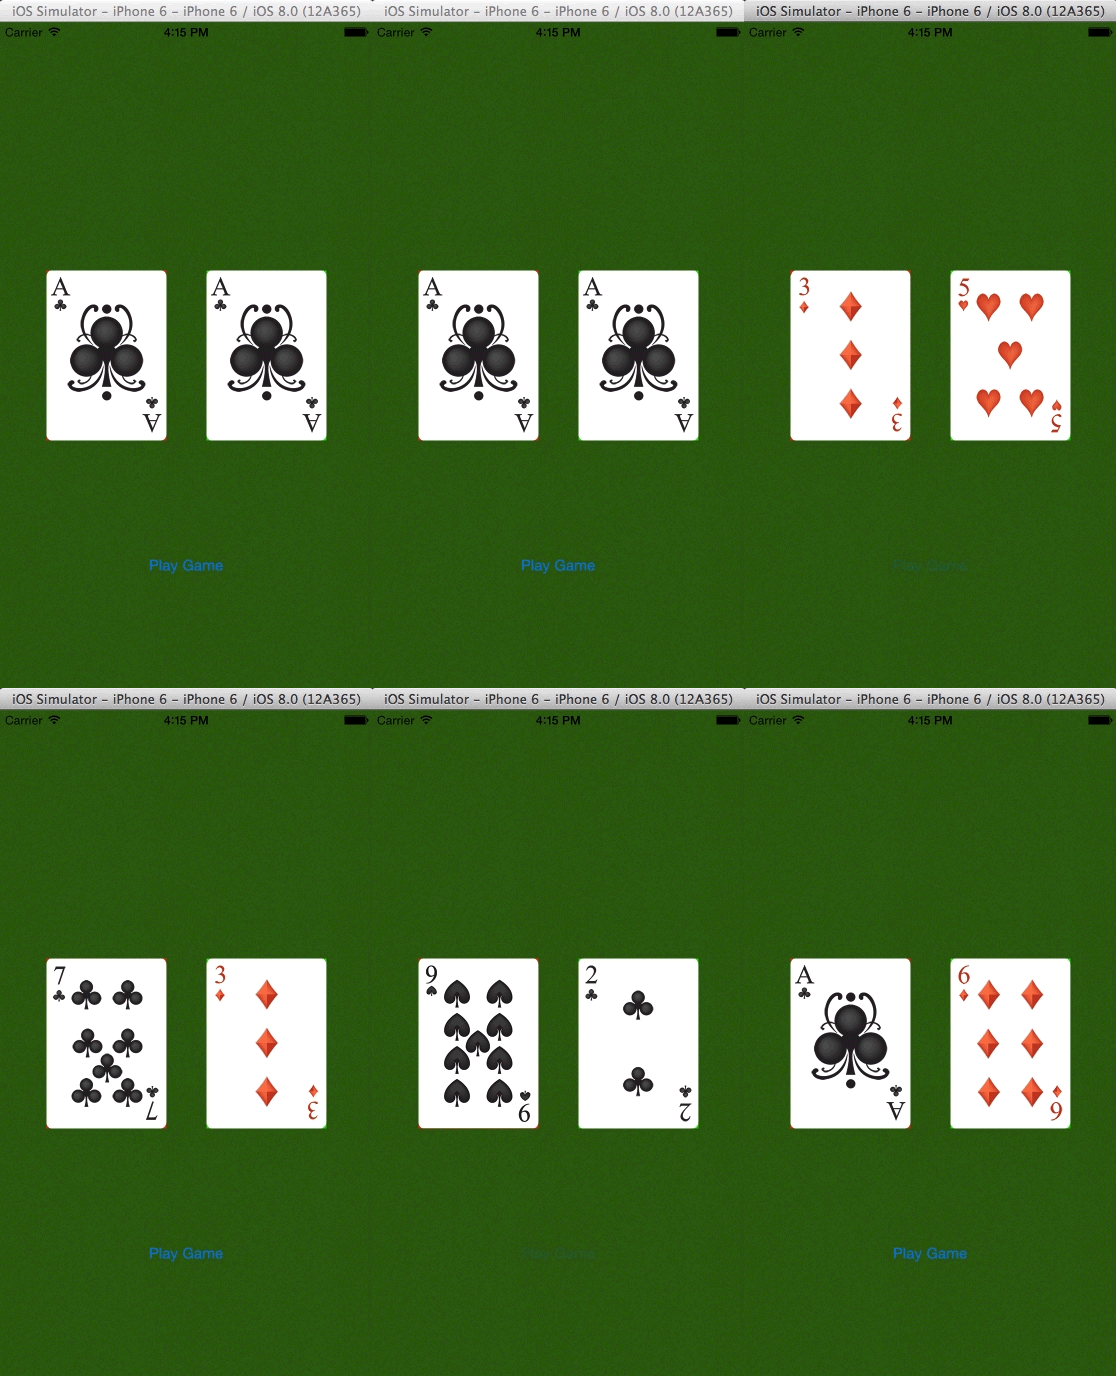
Figure 3: The End result
Xcode Switf Code: Implementing the UI Image to the Card Game
Implementing the UI Image to the Card Game
Today I learned how to add images to the card game project in Xcode 6 and learned about the various image sizes needed for retina and high resolution displays. Its important to have different sizes because each iPhone retina screen size are differ.
Once the images are imported into Xcode 6 image.xacassets folder (which is where the you store the images), the images can be accessed in the storyboard. Below in figure 1 we changed the card UI image from colours to the back of our card image.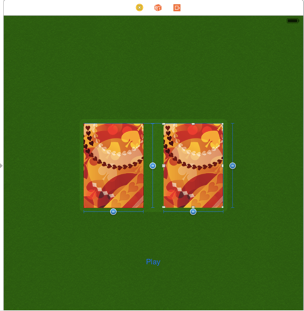
Figure 1: Implemented the back of the card to the UI Image in Xcode’ s Storyboard.
The next step is to get the user to display the cards when he presses the button. So we head to the View Controller.swift and enter the code under the IB action play button. Instead of having the name of the button changing, we will have the card image revealed by using the the self.image = UIImage code as shown below in figure 2.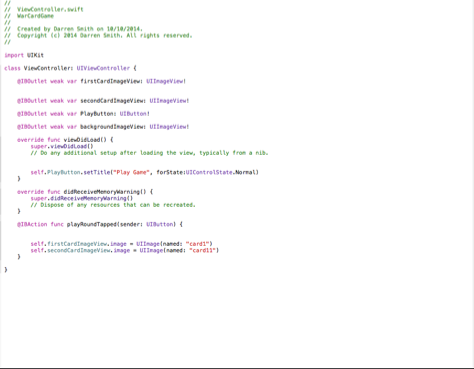
Figure 2: Implementing the code to flip the back of the card.
Once the code is created, it is time to run the program. Figure 3 shows the result.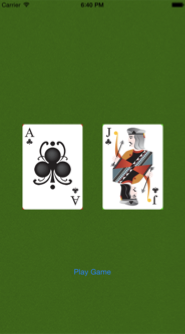
Figure 3: Revealed Cards in the game.
Xcode Swift Code: Introduction to using Classes Methods /experimenting of the Button taps
Introduction to using Classes Methods /experimenting of the Button taps
Before I decide to implement the UI Images, I decide to learn more about the Class Methods in Swift Code. Below in figure 1 is an experiment of using different parameters such as the .self.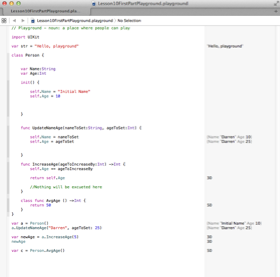
Figure1: Using Xcode Playground to learn how to use Classes in Swift Code.
After playing around with the parameters I then went back the card game in Xcode. Here i learned how to set up the parameters for the button touch. What happens is the when the user presses the play button, the text changes. Figure 2 illustrates this example below.
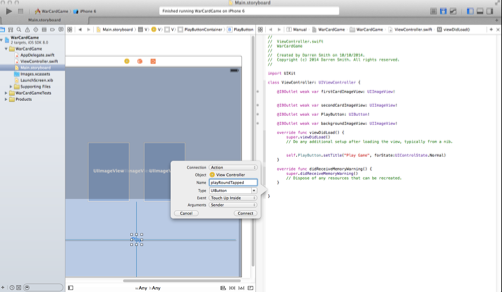
Figure 2: Using the Name Class to label the Button
Xcode Swift Code: Creating the Interface and constraints for the Card Game
Creating the Interface and constraints for the Card Game
Today I learned how to use auto layout in Xcode 6 in order to create the user interface for the card game.
Auto layout is very important because it allows you to resize the buttons and UI images to scale and resolution using aspect ratio. This is particular important because if you want the application to run on several iOS devices, then you need to taken into account the resolution as the screen size differs on each of the devices.
Below is an example of what the Auto Layout looks like.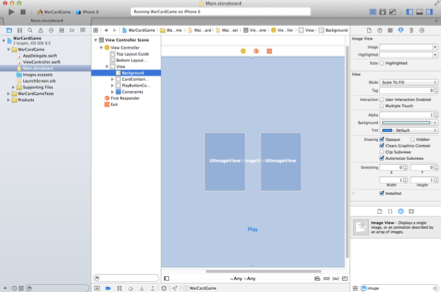
Figure 1: UI Images and the Interface Constraints
Once the Auto Layout is properly set up with its constraints, the image can be applied to the UI Images. To make sure that it is set up properly, I run the game to see what my user interface looks like. The result is shown below in Figure 2.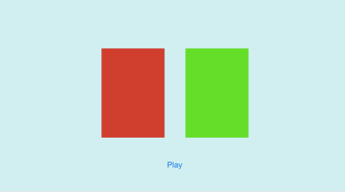
Figure 2: End result of the set up
The step is to implement the card images to my UI Image set up.
Introduction to Xcode Swift Code
Introduction to Swift Coding
Recently I have updated to Xcode 6. What is significant in this latest version is the introduction to a new apple programming language called Swift. Swift is an innovative programming language with an interactive work area called a playground. It will allow me to directly manipulate and experiment with Swift code live.
Xcode 6 extends the Xcode feature set with new live visualisation capabilities. For example, view debugging pauses a running app and then explodes all the UI layers into a 3D visualisation, making it easy to understand how the interface is drawn.
I will continue to use Xcode to learn how to create applications and games for apple IOS iPhone. In addition to C language and C++, I will be also dealing with swift code.
